Showing posts with label google. Show all posts

Tuesday, December 13, 2011


Used to be that you first had data. Then you did analysis to figure out the patterns and trends in it. Now you imagine the pattern and Google Correlate Draw checks if there is a search term that correlates to your pattern. This is awesome.
In case you can’t yet make out what the fuss is. Imagine how a person picks a dress to buy, they find a dress that fits them. Now reverse it, pick a dress and imagine finding a person who would fit it. See that!

Google Correlate Draw Examples

Note: the blue lines are what I drew and Google Correlate plots out matching data in red.

Downward trend

And guess which search term pops up? Windows Server 2003 Enterprise! And a near perfect correlation too :)LittleSnapper

Upward trend

Ends up lots of people had parking tickets on their minds. Am sure city councils would have seen their parking ticket revenue increase in this period.Google Chrome

Sine wave-ish cycle

Curiously the term ‘adware free’ seems to have had a fluctuating fortune.Google Chrome

Further thoughts

Correlate Draw’s approach brings out interesting possibilities. The basic idea of search using something other than text has been attempted before. For example i)Google Goggles, search for images or ii) Voice interface to search term entry or iii) Shazam, search for songs based on recorded snippet, all try to think of search as an activity that transcends looking for “textual” information.
But what is intriguing about Correlate Draw is its ability to search, or should we say match?, for patterns in quantitative data. And that too using an intuitive drawing interface. That twist of expressing a search query as a drawing is what makes this so interesting.
Imagine this. What if an research analyst in a financial firm ‘draws’ stock price movement patterns and have the system bring up companies whose stock price correlates with it? What if every time-series data could be searched in this manner?
There is also the UX aspect. The variation that can be expressed in a drawing can never be matched in a regular search interface. You could have textboxes to capture certain terms, sliders to express value within a range, a drop down to capture a single item out of a set and so on. But the expressiveness in a drawing would be hard to beat.

Thursday, December 8, 2011

Most Popular Browser in India? Chrome Beats Firefox


What’s the most popular browser in India? Well, if you go by Statcounter’s latest report, Chrome has taken over the reigns from Firefox. What’s alarming is IE’s fall and do not be surprised if Microsoft pumps in more money to drive the usage of IE9.
In India, Google has taken a very traditional approach to reach out to the mass – i.e. via print and TV campaigns and the result is in front of your eyes.
Most Popular Browser in India
As far as mobile browsers are concerned, Opera rules the chart very comfortably.
Most Popular Mobile Browser in India
Talking about Pluggd.in traffic, here is the breakup
pitraffic
Guess the color code. Is blue Chrome or Firefox?
PS: Important to note that statcounter report is based on “only” those sites who have installed Statcounter script. That is, take it as a relative ranking and not absolute numbers.

Tuesday, December 6, 2011

Password Protect Google Chrome Browser with Simple Startup Password


If you want to dig the history of a person, dig the history of his web browser and you will know what kind of person he or she is. All the data in a browser like saved passwords, bookmarks, history are very confidential stuffs and any unauthorized access to these can be fatal. If you are a chrome user you can now safeguard your data by protecting it with a password using Simple Startup Password extension.
Simple Startup Password  is a very simple plugin that protect your browser with startup password. 
chrome password
Soon after you install the extension navigate to   to Settings -> Tools –>Extensions and look forSimple Startup Password . To setup the password click on option. Set a password for your browser but make sure you type in correct password before hitting enter because there is no field to re-enter the password.
ssp
Now each time you open Google Chrome you will be asked to authenticate yourself. If you fail to provide the password the browser will close. There is no way in which you can recover the password and thus by any chance you forget your password you will have to reinstall it.

Limitation

  1. You need to be very sure before you set your password as there is no way you can check whether you have typed in correctly.
  2. If you forgot your password by any chance there is no way you can recover it and you will have to reinstall your browser.
  3. The password field is not masked and any one sitting with you will be able to see the password.
  4. If you are quick enough you will be able to press the bookmark button and see all the bookmarks before the plugin loads.
ssp chrome
So what are you waiting for. Download the extension now.

How to Make your Blogger Blog ready for Mobile Phones

making your blogger blog mobile friendlyAs you know, millions of people use their mobile phones to access internet. The mobile internet speed is also very fast these days with 3G's , mobile apps,etc.

From this, we can say many of your readers are coming to your blog through mobile phones..But, if you don't make your blog mobile friendly, .you may lose all your mobile readers because in a mobile phone, a normal blog takes lot of time to load and there are other issues that your site not fitting properly in the mobile screen.

So, here is how to make your Blogger (blogspot) blog mobile internet friendly..

Sign into your Blogger account > Design > Edit html

Find this line..


<b:include data='blog' name='all-head-content'/>

Paste this code below that line...


<meta content='IE=EmulateIE7' http-equiv='X-UA-Compatible'/>

<b:if cond='data:blog.isMobile'>

<meta content='width=device-width, initial-scale=1.0, user-scalable=0' name='viewport'/>

<b:else/>

<meta content='width=1100' name='viewport'/>

</b:if>


Save the Changes!

That's it! Now, your visitors can access your blogger blog through mobile phones with blazing speed...

Google Chrome Full Page Ad in ToI – But why ?


Honestly, I was surprised to see full page Google Chrome ad glare back at me when I picked up the today’s Times of India. It was a full back page Ad that embodied simplicity, in line with how Google is…
GoogleChromeAd Google Chrome Full Page Ad in ToI – But why ?

Now, what was the reason for my surprise on seeing that Ad ?

Because it is Google – A name that has become a synonym to online search… Remember “Google it” and which has, by far, the biggest online advertising Network in the world.
We often see Ads of Microsoft and Yahoo in newspapers and Radio (including some lousy Microsoft Radio Jingles) – I am not too surprised with them, they need those extra eyeballs and audience.
My first reaction at seeing the Ad – Every Indian on Internet knows Google and probably even Chrome, then why take newspaper advertising route ?
If you think little deeper – you will see the reason why. Even though most online Indians know Google Chrome, majority of them don’t have it on their computers. Internet Explorer still hasmajority of browser market share (although decreasing rapidly).
And with Times of India, Google Chrome has directed the ad to right segment of people – middle or upper middle class English speaking population – Most of whom are now starting to use Internet actively.
This advertisement also goes to show that, unlike west, Print media still rules in India. Online penetration is still quite low, and if you need to get attention – print media is your answer.

Google Chrome Web Store comes to India


Google Web Store is growing fast since its launch 9 months back, but it was primarily for US Market only. Today Google announced that Google Web Store will not be available in 24 more countries, including India.
It is not that Google Web Store was unavailable to Indians till now – Anyone across the world could access it, however, it primarily had apps for North American users only. But, with launch of India specific store, the apps will now be more relevant to Indian Audience. Their will be host of new applications from Indian app developers and publishers.
Chrome Web Store Google Chrome Web Store comes to India!
Google’s strategy of moving everything to cloud is now slowly taking shape. If you carry out few searches on Google Webstore, you will find applications that should take care of 90% of your daily computing needs – From Entertainment to Productivity, from Shopping to News, they have everything!

saavn Google Chrome Web Store comes to India!
On a personal level I am a big fan of Chrome browser (although lately, it has been giving some issue) and I have atleast 10 Google Web Store apps that I use on daily basis. They are fast, convenient and browser based. What more can you ask for?
If you have not moved to Chrome as yet, you should – and give a try to host of apps available on Google Web Store. I am sure you will not be disappointed!

About the Blogger "Earnings" tab


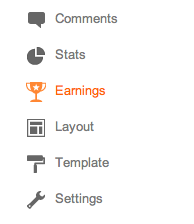
The Earnings tab in Blogger makes it easy to enable AdSense ads on your blog. Once your account has been approved, Blogger retrieves your earnings data so you don't need to visit the AdSense dashboard to access basic earnings information.
Blogger Earnings tab for new interface
AdSense Report
Once you start generating AdSense impressions, you'll begin earning money when people click on ads that appear on your blog. The earnings report (visible when you click the Earnings tab) includes a drop-down bar with TodayYesterdayLast 7 Days,This Month, and All time.
Selecting an option will retrieve the relevant report directly from AdSense.
All time
If you're an existing AdSense user, you'll notice that Blogger created a new channel (with the URL of your blog) in your account. If you have had AdSense ads on your blog before using Blogger’s AdSense integration to insert ads into your blog, note that All time will retrieve data only from the time you connected Blogger to your AdSense account.
This does not affect your overall AdSense reporting, available directly from AdSense.
Terminology
The AdSense report visible from the Earnings tab contains basic information about how many ads have run on your blog, how many clicks were generated, and how much revenue you've earned. Each term in the report is defined below:
  • Page views: A page view is generated every time a user views a page displaying Google ads. We'll count one page view regardless of the number of ads displayed on that page. For example, if you have a page displaying three ad units and it's viewed twice, you'll generate two page views and six ad unit impressions.
  • Clicks: The number of times the ads were clicked on in the given reporting period.
  • Page CTR (Click-through rate): The number of ad clicks divided by the number of page views.
  • CPC (Cost per click): The average amount paid by the advertisers for each ad click.
  • Page RPM (Revenue per mille): This is revenue per 1,000 page views. RPM = (Page views x CTR x CPC) / 1,000
For more information please check out the AdSense Help Center.

Showing ads between your posts


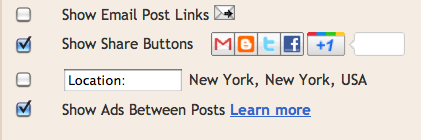
If you want to show ads between your posts, first go to your Layouts tab. Then, in the "Blog Posts" section, click on "Edit." A pop-up window will appear with options to configure your blog posts. Check the box next to "Show Ads Between Posts." (Note: You must be signed up forAdSense before you can check this box.)
Show Ads Between Posts
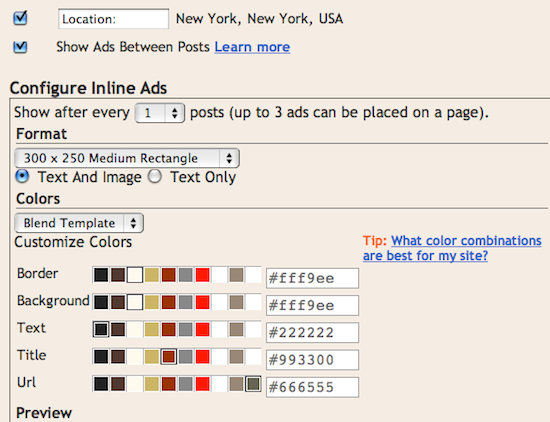
Once you check this box you'll see the configuration options for your ads. You can then select how often you would like ads to be shown after your posts.
Show after every x posts
For example, if you want ads to be displayed after every post, select "1" from the drop-down menu (please note that AdSense policy limits you to a total of 3 ad units per page, and Blogger will automatically prevent you from going over this limit). You can then select your ad format and colors. Once you have finished configuring your ads, click on the orange "Save Changes" button in the bottom right corner.

Letter to Google Chrome


If you have started to love Google Chrome and have made it the default browser on your computer, here's a useful tip regarding your privacy. The tip is more relevant for people who have computers in the living room and that same machine is shared among all other family members.
Google Chrome Address Bar
The address bar in Google Chrome is almost as dangerous as the awesome bar in Firefox.

Why You Need Separate Profiles in Google Chrome

Google Chrome makes it very easy for you to access your web search history including the search queries that you may have typed in the past. Now this may sometimes lead to an slightly embarrassing situation if someone else use your browser because all your past interactions are exposed the moment he or she begins to type in the address bar.
To prevent yourself from getting into this 'not so comfortable' situation, what you can do is create a separate user profile in Google Chrome. Thus all your browser history, bookmarks, cookies, search terms, etc. are not shared with anyone else in the family.

How to Create Profiles in Google Chrome Browser

Unlike Firefox that ships with a Profile Manager, the only way to create multiple profiles in Google Chrome browser is manually. Here's how:
Step 1: Load Chrome and choose "Clear Browsing History" from the Tools menu. This will clear all your private data.
Step 2. Open your Google Chrome installation folder that is available at:
For Windows Vista - C:\Users\<username>\AppData\Local\Google\Chrome
For Windows XP - C:\Documents and Settings\<user>\Local
Settings\Application Data\Google\Chrome
chrome-profileStep 3: Open Windows Explorer and switch to the "User Data" folder available inside Chrome installation folder.
Then select the subfolder caleld "default" and make a copy of it in the "User Data" folder itself. Give that copy a name, say, Your_Name. (See screenshot).
Step 4 (Optional): We will now initialize this new "Your_Name" profile to the factory default settings.
Open "Command Prompt", switch to the Chrome Application folder and run the following command:
chrome.exe --user-data-dir="..\User Data\Your_Name" -first-run
Step 5: So our new user profile is ready. To run Google Chrome using this profile instead of the default profile, just create a shortcut on your desktop, Quick launch bar or your Windows Start Menu.
Right click anywhere on the desktop, choose New -> Shortcut and type the following for location:
For Windows Vista: C:\Users\Aryaman\AppData\Local\Google\Chrome\Application\chrome.exe  --user-data-dir="..\User Data\Your_Name"
For Windows XP: C:\Documents and Settings\User\Local Settings\Application Data\Google\Chrome\Application\chrome.exe --user-data-dir="..\User Data\Your_Name"
chrome-iconsGive this shortcut a "hard to guess" name, change the icon to use that of, say, Microsoft Word and you're done.
Now none of your visits to those "adult sites" would be known to anyone else in the family. And no need for you switch to that incognito browsing mode.

Are Web Pages Not Opening in Google Chrome?


DNS Errors in Google Chrome

Oops! This link appears to be broken in Google Chrome

You are trying to open a web page in Chrome and all it gives you is this error message - “DNS Error – cannot find server.”
You hit F5 to refresh a page but the error persists. You then open an alternate browser, like Firefox or IE, and the website loads up without any problem. So its a Chrome specific issue and has nothing to do with DNS Servers or your Internet connection.
The support page on the Chrome website suggests that you clear your browser cache, delete the cookies and scan your computer for malicious software to fix the issue.
Well, that may not fix your problem because the issue is not “malware” but a built-in Chrome setting that's possibly preventing certain websites from opening up in Chrome.
When you visit a webpage (like a search results page), Google Chrome will pre-fetch the IP addresses of all websites that are listed on that page. Since the browser has the IP addresses of all the links in advance, DNS pre-fetching ensures that any links that may you click on that webpage will load faster. However, when pre-fetching fails, something that’s not very uncommon, you may get the “link broken” error.
chrome browser settings
You are more likely to see such an error when you are trying to open a website that you have never visited before.
The fix is simple -  go to Tools > Options (or Preferences on a Mac) > Under the Hood and uncheck the setting that says “Use DNS pre-fetching to improve page load performance.” This might increase the loading time of certain pages by a few microseconds but you won't at least see that misleading error message.

Disable the “Insecure Content” Warning in Google Chrome


Google Chrome - Insecure Content
When you open a secure (https) website in Google Chrome, the browser may sometimes display a security warning that says – “This page has insecure content.”

What is Insecure Content in Google Chrome?

A web page contains several CSS and JavaScript files and these may be getting served from different locations. If the page is served over https but the associated files are served from a non-secure http website, the browser will throw the “insecure content” warning. Such a feature is present in IE as well though they call it mixed content.

Which files are responsible for the Insecure Content warning?

If you are curious to know why Google, Twitter, Google Docs and other sites display the insecure content warning, open any of these sites in Chrome and press Ctrl + Shift + J. The developer’s console will open in the lower half and you’ll instantly know the files that have caused that annoying insecure content warning.
For instance, the Facebook website serves most of the files from facebook.com over https but it loads the jQuery JavaScript library from googleapis.com over http which leads to that security warning.

How to Turn Off Insecure Content Warnings?

Unlike IE, Google Chrome doesn’t offer an easy option to disable these warnings but you can make use of a command-line switch to quickly turn them off.
Just right-click the Google Chrome icon on your desktop, or inside the Windows Start Menu, choose Properties and add the switch “--allow-running-insecure-content” to the target box. Restart Chrome to apply the changes and you won’t see that yellow bar again.

Do you know your Gmail?


Day One Hundred TwelveGmail changed the way one used to perceive web-based mail service. With its abundant services and cool features it took the world by storm and became a model for others to emulate. The degree of customization combined with the ease of use it offers is remarkable. How many of us then use Gmail for any other purpose than just read and browse our emails?
In this post we will look as some of the basic Gmail features that we might be missing or ignore over a period of time.
Maximum page sizes: For those of us, who receive a large number of emails every day, it is sometimes annoying to click on older email link and go to next page. What we can do instead is increase the number of email we want to see in one page. Go to Mail settings by clicking the gear shaped button on the top right corner of the page. Click General -> Maximum page size and specify the number of conversation you want in one single page.
Add signature just like in outlook: Every time you send an email, you don’t need to write “Thanks & Regards- your name etc…” at the end of email. You can create a signature by going to Mail settings–> General ->Signature. Edit and save a signature for all your future emails.
Vacation reminder: You are going on a vacation and don’t want to offend others by not replying to their emails. You can set a vacation reminder in Mail settings -> General -> Vacation responder. Here you can specify the start and end date of the vacation, subject and a message. The message can read, “I am on a leave for 5 days. I will respond to your email as soon as I am back. Thanks for contacting me.”
Important mail and contacts: This is one feature that I personally like very much. It helps me manage different email accounts from one single interface. Using this feature I can import my emails from other accounts like Yahoo, Hotmail or AOL. I don’t need to personally log in to each account. To use this feature go to Mail settings -> Accounts and Imports -> Import mail and contacts. We can also avoid the use of maintaining multiple accounts by the methods discussed in this post.
Show my web clips above the inbox: Want to know what is happening in the stock market or the gadget industry. Well you don’t need to log out of Gmail anymore. Go to Mail settings ->Web Clips. In the search box located on the left hand side enter the text you want to search and press the ‘search’ button. For example searching ‘Insurance in India’ returns a number of results related to insurance. Now I can choose the one I like and Gmail will be displaying them above my Inbox. I used this feature a lot in my company, as the firewall did not allow me to check stock prices. Here I was, checking stock news by logging into my Gmail account.
There are lots of cooler Gmail features and we will be discussing them further in another post. My personal favourite and the coolest are yet to come!

12 VERY POWERFUL Gmail Tips


Google’s Gmail is one uber-powerful tool. It has features that simply blow away other email utilities.
Gmail’s arsenal is so robust if it had a users manual it would look like a New York  phone book. And getting hit with a ton of worthy features could overwhelm potential users.

So we thought it might help if you were introduced to some the ‘gems’ of Gmail and given the ‘what’s what’ on how they work.
Whether you already use Gmail, are thinking about adding it or migrating to it there are probably some unique things about Gmail you’ve never knew existed. I am 100% sure the information below will help you better utilize the full potential of Gmail.
So take a look below. Then set up and tweak the features that will save you time and organize your life.

TIP #1: Create Unlimited Email ‘Aliases’ with One Gmail Account

If you want to keep track of how your email address is used (ie, when you sign up to a newsletter), add “.” (period only) anywhere in your username. This way you’ll create a new ‘alias’‘ email address and all the messages sent to that new ‘alias‘ address will get forwarded to your primary Gmail address.
So, for example, if your Gmail address is username@gmail.com then you can make variations like:
u.sername@gmail.com (remember, you just change the username, not @gmail.com)
user.name@gmail.com
usernam.e@gmail.com
Any email sent to the above ‘alias ‘ email addresses will go straight to username@gmail.com. Why is this useful? If you use this trick when you sign up to different newsletters and you start receiving spam, you’ll know which newsletter sold your email address to spammers.
The trick we just showed you is a good one. But it is a little difficult for tracking multiple sources of emails that you sign up for. My favorite for easily identified sources is to use “+someword” after your username. You’ll get the same result as above and be able to instantly recognize where the email was entered.
So, when signing up for email updates, newsletters or anywhere you enter your Gmail address, simply add “+someword” after your username.
For CNNusername+cnn@gmail.com
And for the New York Timesusername+newyorktimes@gmail.com
Keep goin’:
username+squidoo@gmail.com
username+twitter@gmail.com
username+googlealerts@gmail.com
And on and on and on…
You can also use a combination of the above 2 tricks. You can build:user.name+twitter@gmail.com
All emails sent to the above addresses will get forwarded to username@gmail.com.
Read on intrepid netters, with the next few Tips we’ll teach you how to make custom labels and apply simple filters to automatically sort these emails as they arrive to your Gmail Inbox.

TIP #2: How to Organize Gmail by Creating Custom Labels

Easy access is the name of the game here. Google Gmail has extra Labels ready to go; Personal, Work, Travel, Receipts and more. No more grinding through a multitude of emails for a flight confirmation number or an appointment time. Just jump to your Travel label then your Work label and grab your info!
You can carry this one step further by creating your own custom Labels. Set up multiple Labels to organize virtually all incoming mail. You are only limited by your imagination: Labels can be made for family, friends, newsletters or just about any kind of email you recieve.
Here how to create Labels in Google Gmail using the illustration below for reference. Look below the Inboxes on the left-hand side of your Gmail window. Below it you will see a link like the one below that reads ‘5 more‘. Click on that link and a menu will drop down. Click on the link near the bottom that says ‘Create new label‘. A window will pop up and you enter the name for your Label and click OK. Done deal!! Now create as many as you need to keep your emails seperate and easy to find.
How can we organize our Labels in Gmail? Easily done. You can drag ‘n’ drop every Label seen in Gmail except for the primary Inbox. Core Labels like Drafts, Sent Mail are the only Labels allowed directly below the Inbox but can be dragged into the “5 More” to get them out of sight. All other can be dragged around to give you the most workable look.
Adding the custom color ‘Chicklets’ to the extra or secondary Labels that Google provides or you create is a breeze. Just move your cursor to the left of any Label and click on the drop down arrow that will appear. Choose a color and click on it and you are done. Notice that below the color choices you will find a list of actions that can be applied to the Labels. The entire list of Labels can also be easily accessed and manipulated any way you desire by clicking on the Manage Labels link which is found directly above the Create New Label link. Try it.
Gmail labels & Chicklets
Now that you know how to use Gmail Labels and accessorize them let’s jump to the next tip where we’ll show you how to automatically filter (sort) emails into the Labels you’ve just created.

TIP #3: How To Set Up and Use Filters in Gmail

Using filters in Gmail can be one of those things that can be conceptually difficult to understand at first. That is, until you do it. Then it’s like a switch was turned on and you can go nuts with it!
The first filter we will apply will be to sort emails from a given email address and we will use the standard emails that the Gmail Team sends out to every user for our example because we have several emails from them in our Inbox. You can use any email address you want but for this example it is more helpful if you choose an email address from which you have multiple emails in the Inbox.
Open an email and look in the upper right corner of the email you will see a drop down arrow to the right of “Reply“. Click the arrow and take note of the actions that can be applied to the email for future reference. In our example we will are using filters so we click on “Filter messages like this“.
Gmail Filters
When we do this we get a Filter window above the email we are using as seen below. The email address of the sender is already entered into the “From” filter data field. Cool beans!
Just click the “Test Search” Tab and all emails from that sender should be in the window below. What to do with all those emails now? Click on “Next Step” and let’s find out.
Now if you have already created Labels when following TIP #1 you are ahead of the game. If not, no worries. In fact, it is just as easy to do while filtering and email.
After clicking on the “Next Step” tab we see the window for creating a filter. You can again see several actions you could apply to the filter.  But we need to label a file to put the emails into so some small part of our lives are organized ;-)
Now we want to check the box next to “Apply the label” and then click on the drop down arrow next to the box showing “Choose label“. A menu will drop down and you can choose a label you have already made or click on “New label” to create another.
Now go to the bottom right portion of that window and check the box to “Also apply filter to “X” conversations below” if you want those included under the new label as well. Now click “Create Filter” and Gmail will take you to a page in Settings which will display all your filters and allow you to edit or delete them.
Remember that you are free to filter any number of email addresses to one label. For instance you could create the label “Newsletters” and then filter all those newsletters you subscribe to by putting their email addresses through a filter and sending them to that Label.
Don’t forget the Chicklets!!!
Now since you are all pros at this we will apply filters to emails sent to our “alias” email addresses. Remember TIP #1 where we created the alternate email addresses for us that would all come to our primary Gmail address? Now we are going to put that to use.
Let’s use my Twitter email contact address. When I signed up I entered “username+Twitter@gmail.com“. Now I’ve received an email from Twitter telling me that I have one million followers!! (In my dreams)
Open the email and click on show details. That will show me the header with the To and From email addresses.  Seeing the header will confirm which ‘alias’ address I used.  Got that?
Now we will follow the same steps as we did in the above example but will enter my “alias” email address in the To: data field.  Continue on as we did before and all Twitter emails will go into the Twitter Label. Easy Pie!
Look at the other data fields in the Create a Filter window. You can also filter by Subject, whether the subject has certain words or whether it doesn’t have certain words. These can be great for spam emails that you get over and over. Make a Filter with those subjects or words. Remember that when you click on Next Step you can choose to apply actions to filters such as delete.

TIP #4: Backup Gmail Messages (in the simplest way possible)

For most people it is a good idea to keep a backup of your inbox and not your ‘sent’ messages. Well, the quick and automatic way is to set up Gmail to forward messages (do it to another email service, like Yahoo or Hotmail).
How do you do this? Go to Settings (top right corner of Gmail window), click on Forwarding and POP/IMAP and then select Forward a copy of incoming mail to. Enter an email address there.

TIP #5: Change “From” Name and “Reply to:” Address

The first one, you might want to do it for privacy reasons. The second one, maybe you send a lot of emails to a lot of people and need another email address to easily manage their responses.
Here’s how to change the “From” name:
Settings (top right corner) > Accounts and Imports > Save Mail As and then click on “Edit info“. The following screen will appear:
See this tutorial on how to change the ‘reply to‘ address.

TIP #6: Set Up Gmail to Show Headers

Now you can see the IP address of the sender and track down those spammers and scammers!!
Here’s a way to do it:
When you click on Show original what you are basically seeing is the address code that computers use to route the mail as well as other tools for analysis. If you don’t understand what those headers mean, here is a good header analysis tool.
Copy everything above the message body in your email and paste it into the box at the top left of the Email Header Analyzer at MX Toolbox.com and click on Analyze Header. This information is helpful when you receive questionable emails and would like to block them in the future.  See your IT guru or the authorities if it’s serious.

TIP #7: Email Security Check!!

Think someone else is accessing your Gmail account? Check the ‘Sign in‘ history in Gmail.
This little trick will let you know if someone has grabbed your password and is peeking into your Inbox.
Here’s how to do it:
At the bottom of any screen in Gmail you’ll see “Last account activity“.
Click on “Details” and there you’ll see a list of the last 10 IP addresses that logged in on your Gmail account and their location (ie., United States (Texas)(IP Address)) and the time and date. These should be the same set of IP numbers if you are using only one device to access your Gmail account.
If you are seeing different IP Addresses and locations logging on to your account it may be that you are logged in at a home computer to Gmail while you are at work.  Also look at the Access Type column and see if the account is being accessed by a mobile device or POP3 when you don’t use those.
Be more concerned if you are seeing locations that are accessing your account that are a great distance from your normal location and especially if that location is from another country.
If you are concerned, click on the button at the top of the window labeled Sign out all other sessions. The current computer you are using will become the only one logged on. At the bottom of the window there is an Alert you can set up that will notify only you if there is unusual activity on the account.
But remember, the best protection you can take is to use a complex password comprised of upper and lower case letters, numbers and special characters.

TIP #8: Hate organizing? Keep It Simple with a Star!

You can ‘Star‘ any message in Gmail and it goes to a special folder labeled, of all things, “Starred“. This is, by default, under “inbox“. You can do this for very important messages you think you’ll need in the future. It can also be given to an email that was filtered and sorted into a label as we looked at earlier. It will be contained in both locations.

TIP #9: Activate Keyboard Shortcuts

This is great for Advanced users or those that just aspire to save time and needless keystrokes.
To activate them, go to Settings > General and look for “Keyboard shortcuts:”
Here’s a useful list of Gmail keyboard shortcuts.

TIP #10: Use the Mail Search Options

You can search emails from a specific domain by entering “From:domainname.com” and clicking “Search mail.” You can also search emails from a specific sender by entering “From:sender@domain.com“. Just jump up to the search field above the Gmail window.
I’ve included an example below:
You can also do more advance searches on your emails by clicking on “Show search options” next to the Search buttons at the top of the Gmail window.

TIP #11: Use Gmail to Manage Your Domain Emails

If you have your own domain (like me) you can set up the email address you own on that domain so it is sent to Gmail.
Take a look at Google Apps where you can find out more about this feature.

TIP #12: Gmail Labs for the Adventurous

Want to send SMS with Gmail Chat, use canned responses or set up custom ‘vacation time’ autoresponder? Gmail Labs is for you! A wide variety of apps that are easily enabled. They are also easily disabled, which is good because Google openly states the these apps are ‘Not ready for Prime Time’.
I could write a tip about each one of the things above (and they’re a small part of Gmail labs.) To take a look at the entire list of tools, go to Settings (top right corner of Gmail window) > and click on the “Labs” tab.